Buy all your Marco Polo Accessories at the Club Shop Visit Shop


Eberspacher d2 upcoming install

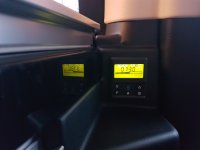
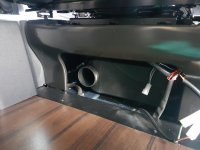
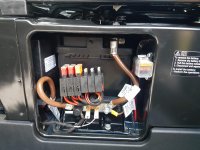
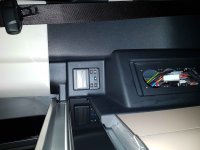
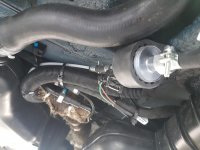
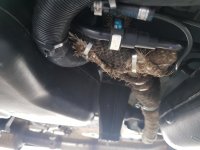
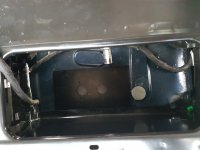
Hi everyone I'm planning to install the d2 airtronic with 7 day timer next week(weather permitting) il post some pictures when complete to help others who may wish to do the same
 
Install almost complete now despite the bad weather, the d2 is in position now all wired up with a 701 programmable timer looks good,I just need to fit the exhaust and fuel pump now and all complete
 

Carol

Active Member
I would love to see pictures of the fitting , as I am keen to get an eberspacher heater fitted.
 
Hi Carol il upload some asap I tried yesterday but the server can't handle the file size apparently ,could you suggest how I might be able to upload some pictures for others to see
 

Method7

Active Member
could you suggest how I might be able to upload some pictures for others to see

I normally wait till my photos have uploaded to google images, they get compressed on the way and are usually ok after that. Otherwise I use Instagram to process them first, they might get cropped this way but are usually acceptable.

I guess Facebook does much the same but I don’t use it.
 
Thanks method 7
il try that, it's all working now I've been hard at it all after noon I just need the little louvre panel from mercedes tomorrow for the project to be complete in many ways i think retro fit is better than the merc option as the 7day timer is located above the little floor light switch panel behind the passenger seat which hopefully makes using it a bit more accessible and it looks great too il sort out all photos and get them uploaded very soon thanks
 
Last edited:
Unit in place carpet still to be reffitted at the front ignore the wiring as it's not finished in this image the unit was fitted with a 90 hood to direct the hot air out it will have some alterations to get the air more to right yet but I 'll do that next I'm picking up the louvre from Merc parts so when fitted it should look like the factory install
 

Attachments

  • 20190320_164931.jpg
    20190320_164931.jpg
    966.3 KB · Views: 117
Last edited:
The exhaust is wrapped with titanium wrap and where it comes close to any items it's wrapped
Again with heat proof Matt its hard to capture in the photo but it's not close to anything and it's wrapped twice in some places
 

Attachments

  • 20190320_164901_1553156054482.jpg
    20190320_164901_1553156054482.jpg
    991.7 KB · Views: 53
This image is the fitting plate I used I could have skipped this as the rubber gasket raises the unit up enough to clear the moulding of the floor
 

Attachments

  • 20190315_162416.jpg
    20190315_162416.jpg
    994.6 KB · Views: 75
Superb. So how tricky was it cutting the holes under the passenger seat for the unit ? How did you connect the fuel system to the fuel tank ?

Is this where the standard fit heater unit goes ?

:)
 
Tricky but doable I removed the seat from the seat box,then the swivel mechanism and that leaves you the seat box I did not unplug the wires to the seat as I didn't want to get lights on dash afterwards so they were left connected whilst work was completed I then removed the black floor trim which will allow access to the seat box bolts.I then lifted the box enough for me to use the drill with ease. I used a 25 bit for big holes and 8mm for the four bolts holding the heater in place and I think a 6mm for the fuel intake. TAKENOTE do not use a bigger hole cutter than 25mm as this will leave very thin margins of metal between holes and the bolts holes thankfully i selected the correct size 25mm and then filed it a little to allow the unit to drop in easy I also cut the carpet out form the right hand side very carefully as there is a loom going to the seat under it and of you cut into it I think all hell with break loose ha ha. I connected it into the input side of my hot water heater pump,which is about a foot away so really no problem there it fired right up after two attempts so not much air in the pipe as it's a short distance
 
Last edited:
Happy days really happy with that bought on Friday finished on Wednesday not breaking any speed records but oh well I did it on the cheap,so who cares hey ,plus ive learnt a lot of useful info about the van along the way. If anyone wants to do this themselves I believe it can be done without even removing the seat just need a angle drill and copy where I have my plate on the picture and you can't go wrong and if you have a hot water heater already fitted it's easy no fuel tank tap required
 

Attachments

  • 20190321_181317.jpg
    20190321_181317.jpg
    978.2 KB · Views: 66
Last edited:
After using the heater since Wednesday I can honestly say it's a revelation warms up the van really quick then modulates down to maintain set temp,so quick in fact that I'm questioning the need for a timer tbh I'm going to see how we get on now with a heat source with regards to upstairs temp and if need be il buy a tee piece to direct some warm to the pop top if it's a bit chilly
 

Carol

Active Member
I’m really grateful for the update and pictures . Your comments re 7 day timer are also helpful. I have not got a hot water unit so guess the fix will be more difficult .l am definately going to a campervan converter to price up a fit
 
No problem Carol, good luck with it,hope you get sorted out I reckon a good price would be 1200 quid and if they have a ramp it would take a day,it took me 10 hrs with no ramp and ive never fitted one before so a professional would be faster and I bought the unit from Bowers ltd in stoke for 830 it would have been 700 without the timer and includes a 36 month warranty
 

Carol

Active Member
Hi Steven
What was thephoto one before last , is this beneath vehicle ,where plate removed for inlet and exhaust ,
From your comments would you still say do not need 7 day timer, fitting price more with timer
 
Top